x
Move Itunes Library From External Hard Drive To New Mac
Step 11: Connect an external drive to your Mac and wait until it pops up on the desktop. Step 12: Drag the iTunes folder from your Mac and drop it on the external drive on the desktop. Now’s the right time to fix yourself a cup of coffee because copying a multi-gigabyte iTunes library is going to take a while.
- Oct 12, 2016 Once you have your iTunes library on an external hard drive, you can relocate it to a new Mac. Quit iTunes on your new Mac. Connect your external hard drive to your new Mac using a USB cable. Open the external hard drive once it appears on your new Mac's screen.
- If not, you can click on the Change button, navigate to the iTunes folder on your external drive, and then click the Open button. (The iTunes Media folder location should now list your external drive as the new location. The actual pathname to your external drive and the iTunes folder will likely be different from what is shown here).
iTunes
- 1. iTunes Tips
- 2. Download iTunes Music
- 3. iTunes Library
- 4. Transfer iTunes
- 5. Others
Puzzled by hundreds of songs in your iTunes library, plus podcasts, TV shows, and Movies that you downloaded from iTunes? Want to know how to move itunes library to external hard drive? Follow the following guide to explore more solutions to move itunes library to external drive.
iMusic - Best iTunes Alternative to Move iTunes Library to External Hard Drive Windows 10/Windows 7/Mac
- Move/Back up iTunes Library to External Hard Drive on Windows 10/Windows 7/Mac with Simple Clicks.
- Copy Files to iOS/Android Devices. Put music, photos, playlists, videos, audiobooks and more from Mac/PC to iPhone, iPod touch or iPad.
- Download Music from 3000+ Sites. Download music from YouTube, Dailymotion, Spotify, etc 3000 music sites for free.
- Record Music from Radio Stations. Record any song that you can play on your PC/Mac with ID3 tags attached.
- Create your music library from thousands of online music sites or music playlists to enjoy anywhere.
Part 1: How to Transfer iTunes from Computer to External Hard Drive
External hard drives have become very necessary tools for those who use laptops or desktops for school or business on a regular basis. Not only are they used to store information that might fill up your hard drive too much, as in the case of movie files or photos, they are often used as backups for the information stored on computers.
iTunes is no exception to this. Computers glitch on occasion, and one of the worst things for many people to go through is the loss of their music and entertainment files because something goes wrong with their iTunes account for whatever reason. This, however, does not need to happen. A simple backup to an external hard drive can be exactly the workaround that many need to prevent the stress of being potentially unable to recover the iTunes library as it appears on their computer, should something go wrong. Many people transfer their iTunes library to the external hard drive as a way of ensuring they never lose their iTunes library in the event of a hard drive glitch. While the risk of something of that nature occurring is low, there is still the potential of that occurring. Here’s how to transfer the iTunes library over:
Step 1. Open iTunes > Preferences
You need to go into iTunes and make sure all your iTunes music files are together, just as you have done with the other modes of transferring your iTunes library over. For Windows-based systems, once you have gotten into iTunes, go to Edit > Preferences.
Step 2. Click Advanced
This will bring you to a series of checkboxes that you need to tick off in order to successfully consolidate your iTunes media library. The box you need to have ticked off is “Copy files to iTunes Music folder when adding to library.” Click OK.
>Step 3. Go to File > Library > Organize Library
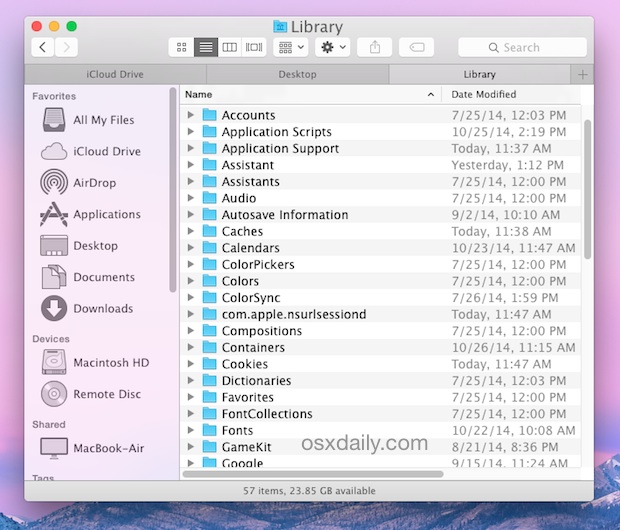
May 30, 2019 Despite the fact that Apple keeps the Mac Library folder hidden from users, it’s good to learn how to show the Library folder on Mac. You may need to access the Library folder when you need to clear cache, remove the app’s leftovers, edit preference files manually, etc. Jan 12, 2020 You can access the hidden Library folder without using Terminal, which has the side effect of revealing every hidden file on your Mac. This method will only make the Library folder visible, and only for as long as you keep the Finder window for the Library folder open. Finder library mac.
iTunes then ensures that copies of the original media files are placed in your library. If you like, once this step is completed you can then delete the originals off your hard drive.
Step 4. Quit iTunes and locate your external hard drive
You need to quit iTunes before you back it up. Your computer will not let you back it up otherwise. If you are on a Mac, you need to go to your Finder. On a PC, go to My Computer.
 You might logically conclude that Photos always opens the System Photo Library unless otherwise instructed, but the app instead opens the Last Opened library.Screenshot by Matt Elliott/CNETTo choose a different library than the library you last opened, hold down the Option key when launching Photos. It will open a dialogue window before opening Photos, asking you to Choose Library or Create New.
Step 5. Find your iTunes folder
On a Mac, you will find your iTunes folder through Finder > username > Music. Depending what system of Windows you are running, here’s where you will find your iTunes folder:
Windows XP: Documents and SettingsusernameMy DocumentsMy Music
Windows Vista: UsersusernameMy Music
Windows 7 or 8: UsersusernameMusic
Step 6. If you can’t find your iTunes folder
Open iTunes and locate Preferences. On Mac, you go to iTunes > Preferences. On Windows, go to Edit > Preferences. Click Advanced. Your iTunes folder will be in the “iTunes Media folder location” box.
Step 7. Drag the iTunes folder to the external drive
If you have many files, you will find that this takes a while. However, when this is done, your iTunes folder is successfully copied to the external hard drive.
Where users of both systems need to know exactly how to transfer iTunes from one system to another – or, for that matter, between systems – it is important to remember that this is a very step-by-step process where if one step is missing, you may find yourself troubleshooting a range of issues with your iTunes library. However, it is a relatively simple process regardless of the system you are starting from, and it should be remembered that most of what you need to remember lies in the Preferences menu. While some individuals may become stressed and wonder how to transfer their iTunes library over, believing it to be a cumbersome process where they will end up quite stressed by the end of it, it is important to remember that it really is not a terribly challenging process.
It is important to note that copying your iTunes library from one computer to another, regardless of whether you are going with the same system (be that PC or Mac) or going across systems, is not that complicated a process and that it can save you a great deal of stress in the long run, particularly if you find that your computer appears to be glitching from time to time. One of the most stressful experiences many today seem to go through is losing their entire music library on iTunes, particularly if that library is hundreds or even thousands of songs long. Whether you copy your iTunes library from one system to another or copy it to an external hard drive, it is a process that is rather easily done, while it may take some time to accomplish depending on the size of your library. It is, however, important to remember that the steps need to be followed in order to ensure that you get the copy made properly. In addition, it is also important to remember that while iTunes is an easy program to use, it may indeed take some time to make a copy of your entire library for copying from one system to another. The best advice is to be patient and let the computer do its work – the results will be worth it in the end.
Part 4: Must-Know Best iPhone/iPad/iPod/Android Phone Manager
iMusic is a all-in-one music manager and downloader for you to easily manage, record and download music. What's more, you can use it to transfer music between iPhone/iPad/iPod/Android phones and iTunes/Mac/PC. Among it's manage function, you could easily move or back up the whole iTunes library to external hard drive.
iMusic is a great tool that integrates all the features you need for getting and managing music. It is able to download and record music from music sharing sites, transfer music between computer and iTunes Library, iPhone, iPad, iPod, and Android devices. Here are its main features.
- Transferring itunes library to external hard drive with simple click.
- Download music from more than 300 music sites to totally free.
- Transfer music between Mac, Windows, iTunes Library and iPhone/iPad/iPod and Android devices
- Record music from music sites, software that can play music on computer.
- Backup music from iPhone, iPad and Android phone to Mac/PC
Guide to Move the iTunes Library to external hard drive with iMusic
Step 1. Go to iMusic's official website:https://imusic.aimersoft.com/ to download the latest version of iMusic then launch it.
Step 2. Connect the external hard drive to the computer, no matter the windows 10 , windows 7 or Mac .
Step 3. Before use it's 'music library', you need to download iTunes from Apple official site, then the music library will become what you see'itunes library'on the interface, just Click 'ITUNES LIBRARY' on the main interface of iMusic, you will enter the Music page by default, and then click the 'playlist'icon at the top-left corner, choose the music you want to export to external hard drive, next click the export mark at the top-right corner to open the external hard drive.
That's it, super easy right ? You have finish the whole process to move the iTunes library to externatl hard drive.
Tips
By Stephen Robles
Tuesday, February 03, 2015, 09:17 am PT (12:17 pm ET)
All the music, podcasts, movies and TV shows you've downloaded to iTunes are most likely taking up a good amount of hard drive space and can easily be moved.
Before starting the process, we suggest making an up to date Time Machine backup of your computer to an external hard drive or Time Capsule. Be sure the external hard drive you use to perform this backup is different than where you will move the iTunes Library should anything happen.
To begin moving your library, open iTunes, click File in the Menu Bar and select Library > Organize Library
Check the box that says Consolidate files and click OK. This will make sure all the music, movies and other files are actually located in the iTunes Media folder that will be moving to your external drive.
Move Itunes Library To External Drive
If you moved your iTunes Media folder in the past, it is best to double check the folder iTunes is actually accessing for your library files. To do this, go to iTunes in the Menu Bar > Preferences and click the Advanced tab.
Under the iTunes Media folder location you will see a path to the files you are about to move. By default, this should be located in the Music folder of your Home directory.
Quit iTunes by going to iTunes in the Menu Bar > Quit iTunes or press Cmd + Q. Connect the external hard drive that you will use to copy the iTunes library. You should see it appear on your desktop.
Open a new Finder window and click Music in the left sidebar. Click and drag the iTunes folder onto the external hard drive icon on your Desktop.
Depending on how large your library is and the connection speed of the external drive, it may take several minutes or longer to complete the copy process.
Once the copy is completed, hold the Option key on your keyboard and open iTunes from the Dock or Applications folder again. A new window will pop up asking you to Create Library or Choose Library. Click on Choose Library.
In the browser window that appears, navigate to your external hard drive, click the iTunes folder there and choose the iTunes Library file.
iTunes will then open and as long as the external hard drive is connected, iTunes will reference the library on the external drive and not on your computer's drive.
Quit iTunes once again and eject the external hard drive holding your new iTunes Library. Open a new Finder window and navigate to the Music folder in the left sidebar again.
Right click or Ctrl+click on the iTunes folder and move it to the Trash.
Finally, to free up the space on your internal hard drive, open the Trash from the Dock or Finder window and click Empty Trash in the upper right corner.
Itunes On External Hard Drive
Your iTunes Library has officially been removed from the internal drive. You can now reconnect the external hard drive you used to copy the iTunes Library, open iTunes and use it as normal.If you open iTunes without your external hard drive connected, iTunes will give you an error message saying the 'Library cannot be found.' Quit iTunes, connect the external hard drive and reopen iTunes to fix.
You may want to copy your iTunes folder onto a second external hard drive as a backup as well. iTunes Match for $25 per year will also backup all your music to Apple's cloud service.
Where to buy an external drive at discount
Choosing a high-quality Mac-formatted external hard drive instead of an Apple-branded Time Capsule will often save you hundreds of dollars. Of all the Apple Authorized Resellers who deal heavily in storage devices, B&H Photo, Adorama, and Amazon offer the best mix of brand options, discounted pricing, availability, and cost-free shipping. Below are some quick links that jump to the available Mac-formatted storage options currently available from these resellers:
1TB to 6TB External Hard Drives (Mac Formatted) from $95.99 @ B&H
1TB to 6TB External Hard Drives (Mac Formatted) from $119.00 @ Adorama
750GB to 6TB External Hard Drives (Mac Formatted) from $65.00 @ Amazon
500GB to 6TB Portable Hard Drives (Mac Formatted) from $99.00 @ B&H
500GB to 6TB Portable Hard Drives (Mac Formatted) from $56.99 @Adorama
500GB to 6TB Portable Hard Drives (Mac Formatted) from $58.00 @ Amazon